Deploying Kubeflow
This post will help you to deploy Kubeflow on a Kubernetes cluster that has been provisioned using kubeadm on AWS EC2 instances. Make sure that the EC2 instance has sufficient resources (e.g. t3.2xlarge, 80 GiB gp3 storage). This assumes that you have Kubernetes v1.25.6 installed and operational, since Kubeflow requires K8s up to 1.25. The scripts here will help you to install Kubernetes.
For the associated files, visit this repo.
Step 0 : Housekeeping
This setup was done on a single node cluster. We need to remove the taint on the control plane.
kubectl taint nodes --all node-role.kubernetes.io/control-plane-
During pod creation, you might see errors in the logs stating ‘Too many files open’. To avoid this, you can execute the following commands in advance.
sudo echo "fs.inotify.max_user_instances=1280" | sudo tee -a /etc/sysctl.conf
sudo echo "fs.inotify.max_user_watches=655360" | sudo tee -a /etc/sysctl.conf
sudo sysctl -p # to apply settings immediately (without rebooting)
Step 1 : Create a Default Storage Class
Kubeflow also requires a default StorageClass.
kubectl apply -f local-path-storage.yaml
kubectl patch storageclass local-path -p '{"metadata": {"annotations":{"storageclass.kubernetes.io/is-default-class":"true"}}}'
kubectl get sc
Step 2: Install Kustomize
Kubeflow requires kustomize v3.2.0
curl -Lo kustomize https://github.com/kubernetes-sigs/kustomize/releases/download/v3.2.0/kustomize_3.2.0_linux_amd64
chmod 777 kustomize
sudo mv kustomize /usr/local/bin/kustomize
Step 3 : Install Kubeflow Manifests
We will clone the repository for Kubeflow manifests
git clone https://github.com/kubeflow/manifests
cd manifests
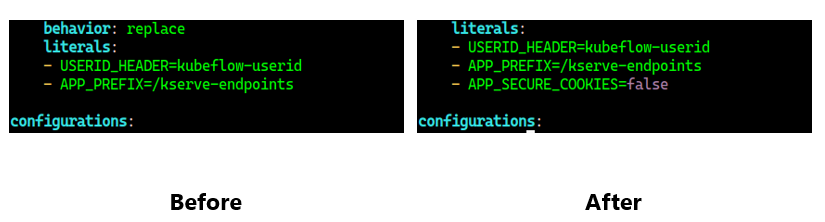
However, we need to make a couple of changes. Since we will be port-forwarding to the HTTP endpoint, we need to make sure that the components can also work without certificate. To fix this, we will make two changes.
vi contrib/kserve/models-web-app/overlays/kubeflow/kustomization.yaml
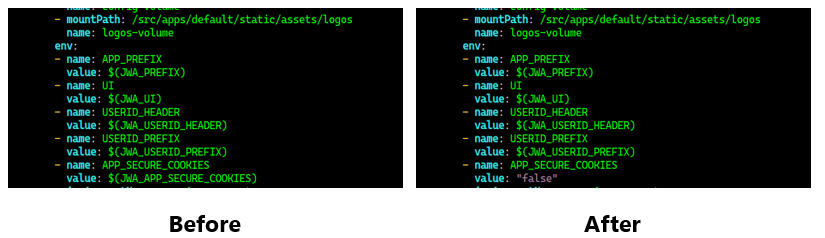
vi apps/jupyter/jupyter-web-app/upstream/base/deployment.yaml
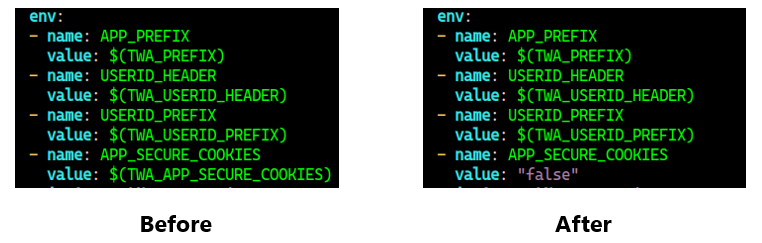
vi apps/tensorboard/tensorboards-web-app/upstream/base/deployment.yaml
Then, execute the following to install Kubeflow
while ! kustomize build example | kubectl apply -f -; do echo "Retrying to apply resources"; sleep 10; done
Make sure all pods are in the running state before proceeding.
Step 4 : Allow Kubeflow Pipelines access from Jupyter
This step ensures that the Jupyter notebooks can have access to the Kubeflow pipelines. (This step is not required if using Charmed Kubeflow).
k apply -f access_kfp_from_jupyter_notebook.yaml
Step 5 : Secret for KServe
We need to create a secret so that we can deploy our model to KServe while fetching files from Minio.
k apply -f set-minio-kserve-secret.yaml
Step 6: Port-Forwarding
We will port-forward to the (ClusterIP) service named istio-ingressgateway. Run the following command in a separate terminal.
kubectl port-forward --address="0.0.0.0" svc/istio-ingressgateway -n istio-system 8080:80 &
Step 7: SSH to EC2
With SSH, we will use dynamic application port forwarding. This allows us to open multiple ‘local URLs’ within our client machine.
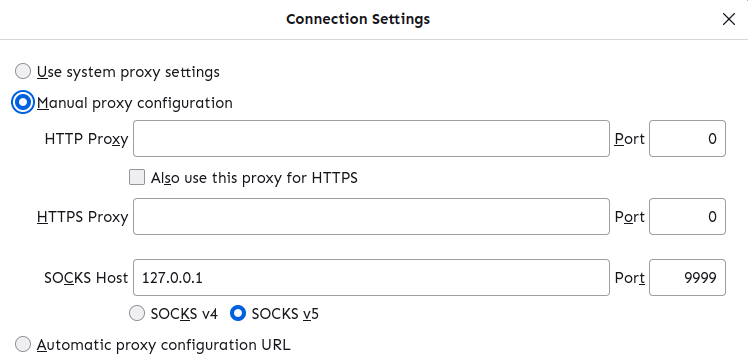
ssh -i "./.ssh/{keyfile}.pem" -D 9999 ubuntu@{public_ip_of_ec2}
Then, open Firefox and set its proxy settings as follows.
Now, you can open http://{private_ip_of_ec2}:8080.
The default username/password are: user@example.com/12341234
Step 8: Minio Access
We also need to port-forward to the Minio service if we want a sanity check for our files.
kubectl port-forward --address="0.0.0.0" svc/minio-service -n kubeflow 9000:9000 &
Now, you can open http://{private_ip_of_ec2}:9000.
The default username/password are: minio/minio123